Roofing
8 Steps in the Roof Replacement Process (And What to Expect)
If you’ve never had a roof replaced before, the whole thing can feel like a black box. You know it needs to happen, but you’re not sure what comes first, how long it takes, or what you should be doing while a crew tears apart the top of your house. Understanding the roof replacement process from start to finish helps you feel prepared, make better decisions, and know what questions to ask your roofing contractor before signing anything. If you’re already doing your homework, it helps to learn what goes into a professionally installed roof before the crew ever arrives.
Here’s what this blog covers:
- Before the crew arrives: What happens during the estimate and contract phase
- Material selection: How roofing materials get chosen and ordered for your job
- Installation day: What the actual work looks like from tear-off to roof ridge
- Cleanup and inspection: How a properly run roofing project wraps up
- After completion: What to expect once the crew pulls away
We’re proud to serve homeowners in Davenport, IA, and nearby communities with roof installation, siding, windows, and more.
Why Understanding the Process Matters
Most homeowners only go through a new roof installation once or twice in their lifetime. That makes it easy for contractors to rush through steps without you noticing, or for costs to feel surprising because no one explained the timeline upfront. Knowing what’s supposed to happen at each stage of a roofing project puts you in a much stronger position as a homeowner.
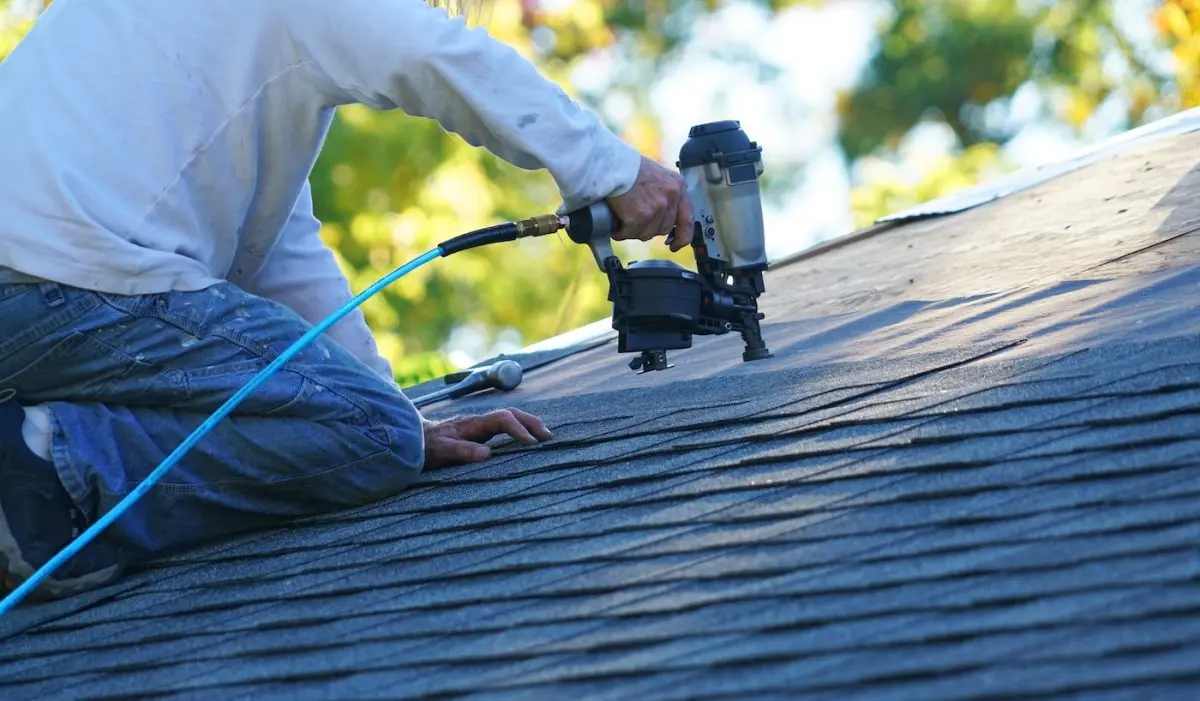
A good roofing contractor walks you through every phase before work begins. If yours isn’t doing that, it’s worth asking why.
- Inspection first: A thorough on-site assessment comes before any estimate so the scope of work reflects what’s actually on your old roof.
- Written estimate: Everything, materials, labor, disposal, and timeline, should be documented in writing before you commit.
- Permit pulling: Your roofing contractor should handle the permit in most jurisdictions, not hand that off to you.
- Material selection: You’ll choose shingle style, color, and product line with guidance from your project manager before roof installation begins.
8 Steps in the Roof Replacement Process
Roof replacement isn’t a single event. It’s a sequence of decisions and actions that build on each other, and skipping or rushing any one of them tends to show up later as a problem. Here’s how a well-run roofing project unfolds from the first call to the final inspection.
1. Initial Estimate and Contract
Your roofing contractor visits the property, takes measurements, and assesses the condition of your current roof system. From there, you’ll receive a written estimate that outlines the full scope, new roofing materials, labor, and timeline. Once you agree on the terms and sign the contract, the job gets added to the production schedule. For most reputable contractors, jobs are scheduled two to four weeks out from the contract date depending on the season and demand.
2. Material Ordering and Delivery
Once the contract is signed, your contractor orders the materials. Asphalt shingles, underlayment, flashing, starter shingles, ridge caps, and any other components are sourced and typically delivered to your property a day or two before roof installation begins. You’ll want to make sure your driveway is accessible and that vehicles are moved away ahead of delivery day. Clearing the work area of outdoor furniture and anything near the roofline before the crew arrives makes the whole process smoother for everyone.
3. Tear-Off and Roof Deck Inspection
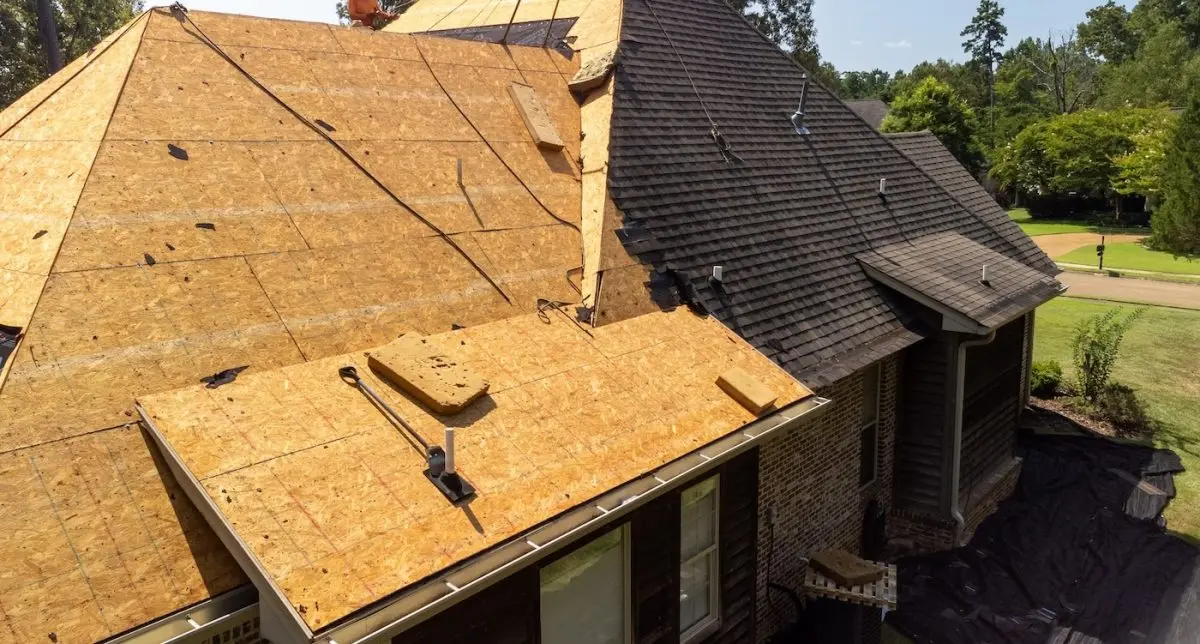
Installation day starts with removing the existing roofing material down to the roof deck. This is the loudest and most disruptive part of the process. Once the old roof is off, the crew inspects the deck for rot, soft spots, or water damage. Any compromised decking gets replaced before anything new goes on top. This step is non-negotiable on a properly run job, and it’s one of the reasons a roofing material choice that includes a full tear-off is almost always the better long-term decision.
4. Underlayment and Ice and Water Shield
Before a single shingle goes down, the crew installs protective layers beneath the new roof system. Ice and water shield goes along the eaves and in valleys where water is most likely to pool. Synthetic underlayment covers the rest of the roof deck, acting as a secondary barrier against moisture. Proper ventilation is also addressed at this stage, because a roof system without adequate airflow is prone to moisture buildup, mold growth, and premature material breakdown regardless of how good the shingles are.
5. Starter Shingles and Field Installation
Starter shingles go down along the eaves and rakes before the main field of shingles is installed. They create a sealed edge that prevents wind uplift and water infiltration at the most vulnerable points of the roof. From there, shingles are installed row by row working upward from the eaves. Roofing material choice significantly impacts how this process goes, with heavier architectural shingles requiring more precision in nailing patterns and alignment than standard three-tab products.
6. Flashing, Roof Ridge, and Final Details
Flashing gets installed around chimneys, skylights, vents, and anywhere the roof meets a vertical surface. Flashing done incorrectly is one of the most common sources of roof leaks, so this step deserves as much attention as the shingles themselves. The roof ridge cap runs along the peak and seals the topmost edge while also playing a role in attic ventilation. Once the ridge is done, the crew does a final pass to check for any exposed nail heads, gaps, or misaligned shingles.
7. Cleanup and Magnetic Sweep
A professional crew leaves your property the way they found it, minus the old roof. All torn-off material gets loaded and hauled away, and a magnetic sweeper goes over the yard and driveway to pick up stray nails. This step matters more than homeowners expect, especially if you have kids or pets spending time outside.
8. Final Walkthrough and Inspection
Before the crew leaves, a project manager or crew lead should walk the property with you to review the completed work. The final inspection ensures the roof meets quality standards, matches what was outlined in your contract, and passes any local code requirements. This is your opportunity to ask questions and flag anything that looks off before anyone signs off on the job.
What the Timeline Actually Looks Like
One of the most common questions homeowners have going into a new roof installation is how long the whole thing takes. The answer depends on a few factors, but here’s a general breakdown.
| Phase | Typical Timeframe |
| Estimate to contract | 1 to 3 days |
| Contract to scheduled start | 2 to 4 weeks |
| Material delivery | 1 to 2 days before install |
| Installation | 1 to 2 days for most homes |
| Cleanup and inspection | Same day as install |
| Warranty documentation | Within 1 to 2 weeks after |
Weather, material availability, and crew scheduling can all affect these windows, but a good roofing contractor gives you realistic expectations upfront rather than overpromising on speed.
What to Know About Roofing Materials
The roofing materials you choose have a direct impact on how long your roof lasts and what the overall replacement costs. According to the National Roofing Contractors Association, most new roofs are designed to provide useful service for about 20 years, though that lifespan varies considerably based on material type, installation quality, and local climate conditions. Asphalt shingles last 15 to 25 years on average in Midwest climates like Davenport, where freeze-thaw cycles and seasonal storms put real stress on roofing systems year after year. Investing in durable materials upfront reduces long-term costs by extending the replacement cycle and limiting how often repairs become necessary.
- Three-tab asphalt shingles: Budget-friendly and widely available, but thinner and more prone to wind and weather damage over time.
- Architectural asphalt shingles: Thicker, more durable, and better looking than three-tab, with a longer expected lifespan and stronger wind resistance.
- Impact-resistant shingles: Designed specifically for hail and storm-prone regions, these carry higher upfront costs but offer significant protection in Midwest weather conditions.
- Premium luxury shingles: Engineered to replicate the look of slate or wood shake with a longer lifespan, best suited for homeowners prioritizing curb appeal and longevity.
Common FAQs About Roof Replacement
Homeowners tend to have a lot of the same questions when going through this process for the first time. Here are the ones that come up most often.

Do I need to be home during the replacement?
You don’t have to be present for the entire installation, but it’s a good idea to be available at the start and end of the job. Being there at the beginning lets you do a quick walkthrough with the crew lead, and being there at the end gives you the chance to review the finished work and ask questions before signing off.
Will my landscaping be damaged?
A well-run crew takes precautions to protect your yard, typically laying tarps around the perimeter to catch debris. Talk to your roofing contractor beforehand about any plants, garden beds, or features you want them to be especially careful around.
What happens if it rains during installation?
Most roofing crews monitor forecasts closely and won’t start a job if rain is expected mid-install. If weather moves in unexpectedly, exposed decking gets covered with tarps until conditions improve. A reputable contractor has a plan for this and communicates it clearly before the job begins.
How do I know if I need a full tear-off or if a second layer is okay?
Most building codes allow up to two layers of shingles on a residential roof, but that doesn’t always make it the right call. If your roof deck has damage, if the existing layer is severely deteriorated, or if you’re upgrading to heavier architectural shingles, a full tear-off is the better long-term decision. Your contractor should explain which option applies to your situation and why.
What warranties should I expect after the job?
You should receive two types of warranty documentation after a successful roof replacement project: a manufacturer’s warranty covering the materials and a workmanship warranty covering the installation. Make sure both are in writing and that you understand what voids each one before the crew leaves the job site.
Ready to Move Forward? Jansen Roofing Has You Covered
A roof replacement is one of the biggest investments you’ll make in your home, and the process only goes smoothly when your contractor is upfront about every step. At Jansen Roofing, we walk every Davenport homeowner through the full scope before a single shingle comes off, because you deserve to know exactly what’s happening with your own house. As a CertainTeed Premier Contractor with over 35 years serving the Quad Cities, we bring certified materials, licensed crews, and a process built around doing the job right the first time. When you’re ready to move forward, contact our team to schedule your free estimate.